Create custom maps for Tenshu General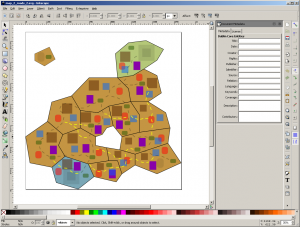
Now that you have played Tenshu General you might want to create your own maps, try them out and maybe share them with other players. This page gives you a step by step description of how to do just that!
1. Prerequisites
In order to create your own maps you need just one tool, Inkscape. Inkscape is a vector based drawing tool that we have used to create all the maps in Tenshu General.
- First, download Inkscape from http://inkscape.org/en/download/. All subversions of 0.48 are supported
- Install Inkscape following the steps described on their website
- Once finished, start Inkscape and navigate to the custom-maps folder. This should be:
- Windows: C:\Program Files (x86)\Desura\Common\tenshu-general\custom-maps
- Linux: <desura install folder>/Common/tenshu-general/custom-maps
- You should see some custom maps that ship with the game already. These can be used as examples.
- All the maps in this folder can be played from the “Custom Maps” menu in the game
2. Map design
Each map must contain a set number of layers and elements in order for it to be a valid map that you can play. This section gives you an overview of how to add these components to your map using Inkscape.
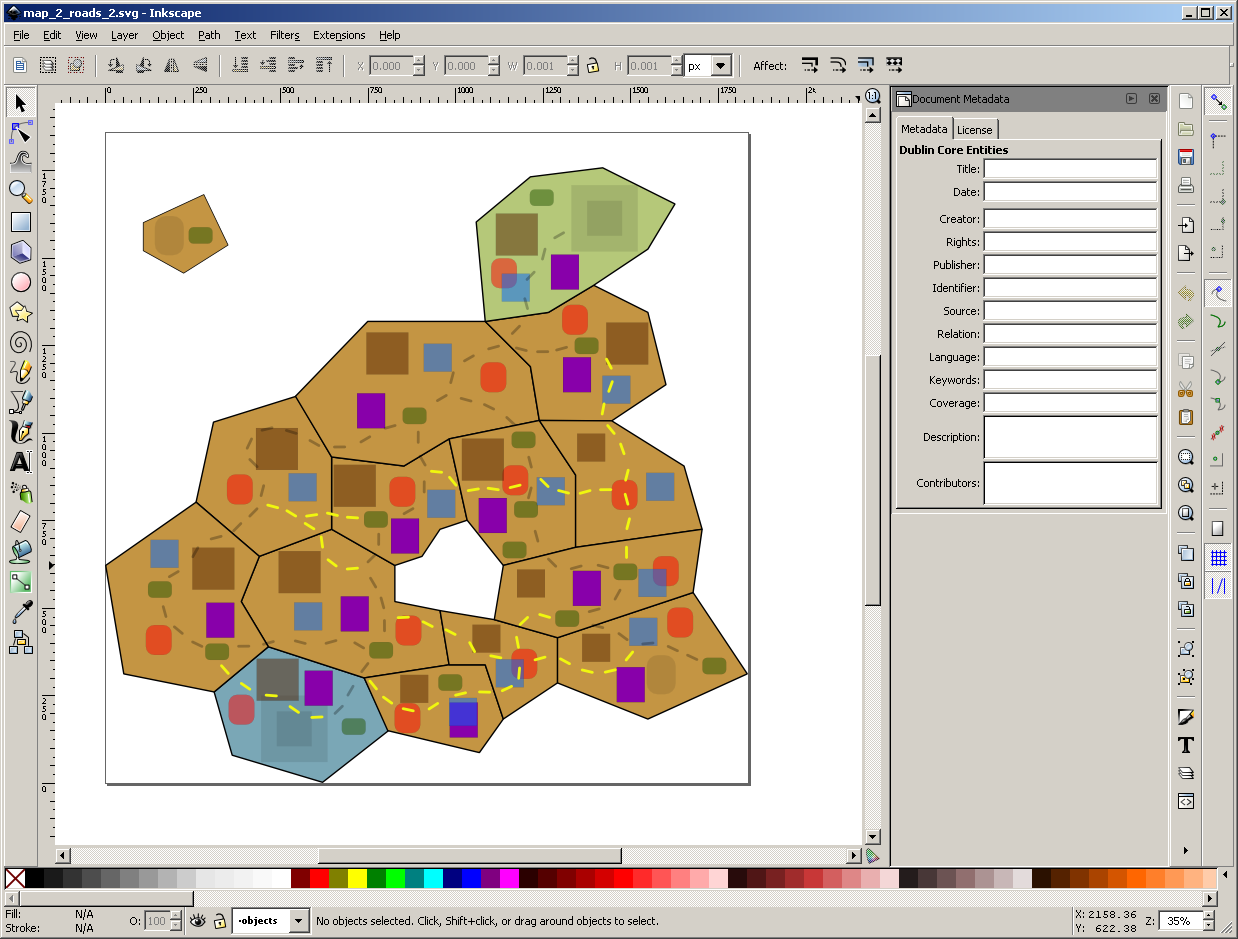
Layers
The maps is separated in different layers that have specific functions. Each layer must have the exact name described below so the game can identify it.
- Bottom layer “area”: this layer contains all the province shapes. Each province has to be a polygon shape. The points of the polygon should overlap exactly with a point of another polygon or the edge of a polygon. Unless the point is on the “coast” of the map.
- Middle layer “objects”: this layers contains all the static objects on the map. See the objects section for more information.
- Top layer “roads”: this layer contains all the road element, that are used by armies and advisers to travel along. There are two types of road elements, regular and off-road. See the navigation section for more information.
Inkscape shapes
The type of object a particular rectangle represents is determined by its properties. If you right click on one of the rectangles and select “Object Properties”, you can see what the rectangle represents. Each object contains three fields that are important: id, label and title.
- id: uniquely identifies each object on the map. In general you can leave this unchanged. Except when setting up the neutral rebel player.
- label: this field always identifies a particular rectangle
- title: in general this field holds additional attributes for a particular type of object
Provinces
As described, provinces are represented by polygons. In the object properties you have to specify in the label field to which han the province belongs: 0 = rebel, 1 = Atsuko, 2 Daichi, 3 = Hiroshi, 4 = Katashi. There has to be one province which is the home of the rebels, this province is invisible in the game, but required for the logic to operate. You can define the rebel home by setting the id field to “neutral-home”. For each han in the map, one of its provinces has to have an id starting with “start-prov_” followed by its han number, e.g. “start-prov_1”. This is to identify which is the province that holds the daimyo(chief) of the han. This is used in the maps menu to show the avatar of that han.
Objects
The map items in the game, such as Tenshu’s, villages, etc., are represented on the Inkscape drawing as rectangles. If you take a look at one of the examples you can find the different types. It’s very important that you place them exactly in a single province shape in order for the game to place them properly. As you can see in the examples, we have colour coded them for easy recognition.Look at the following table to get an overview of all the possible objects and their attributes:
| Object | ID | Label | Title |
|---|---|---|---|
| Adviser base | Generated by Inkscape. | adviser_location | Fixed value: lvl-1 |
| Army base | Generated by Inkscape. | army_location | Holds the army specification. See "Armies" section for more information. E.g. lvl-1;neutral_army: INF=1, CAVAL=1, ARCH=0 |
| Road | Generated by Inkscape. | road, or road: off-road | Not used. |
| Tenshu Location | Generated by Inkscape. | tenshu_location | Not used. |
| Tenshu | Generated by Inkscape. For the neutral tenshu this should be "neutral-tenshu" | tenshu | Name of the Tenshu. |
| Terrain | Generated by Inkscape. | landscape: mountains, landscape: forest, or landscape: plains | Not used. |
| Village | Generated by Inkscape. For the neutral village this should be "neutral-village" | village | The title is used to indicate the level of the village: lvl-<level>, level can be between 1 and 4, e.g. lvl-2 |
Armies: In rebel provinces you can specify in the Army base properties the configuration of a rebel army (white flag). At the start of each new game the configurations that you have specified are placed in random order in the provinces that have an army configured. In other words, the amount and location of the rebel armies is always the same, but the predefined configurations are randomly distributed across those locations.
To specify a neutral army put the configuration in the title field:
lvl-1;neutral_army: INF=#, CAVAL=#, ARCH=#
Where # is from 0 up to and including 4
Navigation
Road segments connect Army and Adviser Bases to each other. Copy the segments for road and off-road from one of the example maps and place them in a pattern on the map. Use the rotation function in Inkscape to orient them in the direction of your choice. The segments have to be spaces such that they are close enough to connect, but not too close that every segment becomes interconnected. By using the map checker inside Tenshu General you can verify the roads connect all the bases. Please note: villages are also points on the road, so it is not required to place road across them.
IMPORTANT: road segments need to be placed in the roads layer!
3. Final steps
There are a couple of finishes to each map that have to be executed precisely in order for the map to work correctly.
- Each map is require to have exactly one neutral province that is configured to be the home of the rebels (see details of how to in the other sections)
- The rebel home province needs to be added last to the map, after you have created all the other provinces
- Once you have created all the provinces (included the rebel home), you have to fit the svg size to the map size:
- Open the document properties: Ctrl + Shit + D
- Expand the “Resize page to content…” button
- Click the “Resize page to drawing or selection” button
- Save your svg drawing
Next section we will expand a little on some tips for designing maps.
4. Designing a good map
When you create your own map, you have the freedom to create it any way you like. However, to make a map interesting and fun, there are some things to take into account. First of all, before starting the design, think about the ‘theme’ of the map. Do you want to make a spacious map with lots of territories or do you want a small fast playing map? Do you want to make a realistic map or a kind of crazy map for experimenting with the game play? You might want to make your map symmetrical for a balanced experience or a purposefully unbalanced map with lots of resources for one of the players.
Here are some other aspects to think about:
- You can vary province shapes to give different provinces a different purpose
- Long shapes for fast travel (less borders to cross): a ‘connecting province’
- Large provinces with many villages: a ‘resource province’
- Vary terrain types and roads to support different types of game play
- Use lots of ‘plains’ to support fast movement with cavalry
- Use mountains and the ‘dirt road’ road type to create hard to cross passages
- Delete a province in the middle of your map to create a lake, which can form an obstacle or bottle neck for players
- Place rebel armies to create temporary obstacles that players have to overcome